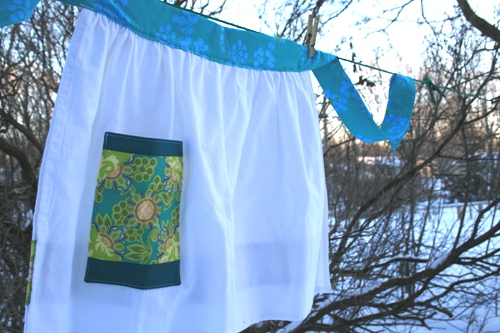
These aprons are so fast and easy because the base is a pre-hemmed tea towel.
Interested?
Materials:
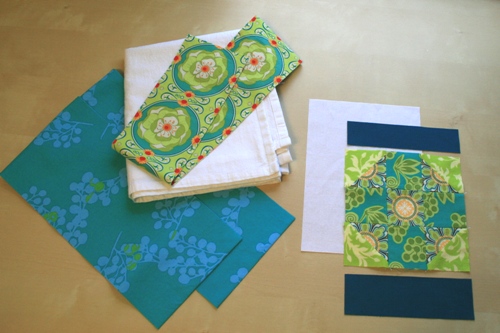
1 large tea towel (mine measures 33"x38" and I buy them here) If you don't want to buy a pre-made towel, you can use a similarly dimensioned piece of fabric. Just be sure to finish the edges before you start making the apron.)
For the pocket
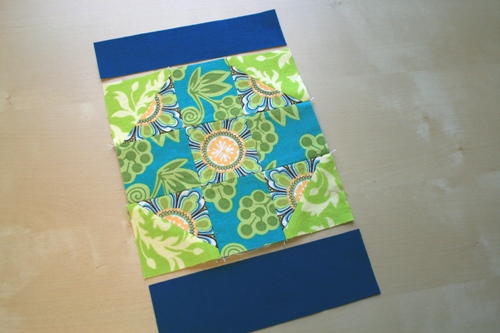
-1 6.5"x6.5" (unfinished) quilt block (we used the Shoofly block)
-1 1.5"x6.5" strip of quilting cotton
-1 2"x6.5" strip of quilting cotton
-1 9"x6.5" piece of quilting cotton for the pocket lining (I used white to match the towel but a patterned fabric would add extra awesomeness)
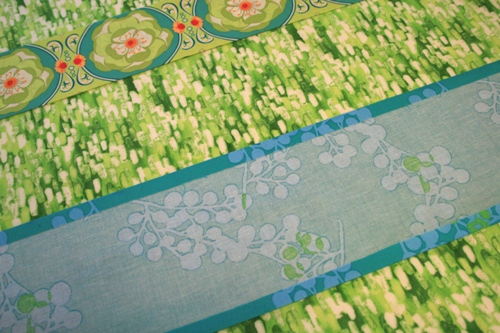
For the stripe: 1 piece of quilting cotton 4"x36" (if you are using a different sized towel, the length of this strip is (length of towel)+3")
For the sash: 2 pieces of quilting cotton cut selvedge to selvedge (40"-42") x 6"
Step 1: First we'll make and attach the pocket. To make the outside of your pocket, sew your two fabric strips on opposite sides of your 6.5" block:
Sew your pocket front and your pocket lining, right sides together (1/4" from all sides). Leave a few inches open on one end so you can turn your block. Trim corners to reduce bulk.
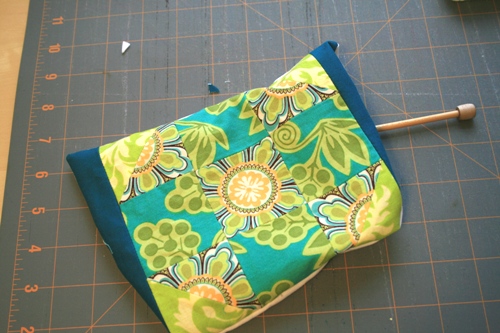
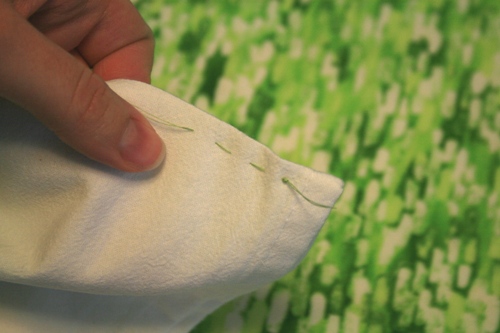
Turn your block using a knitting needle or similar...try to get your corners pointy:
Iron your pocket so it's nice and flat.

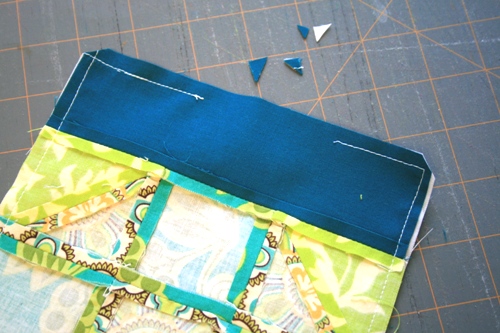
Sew along the top edge of your pocket (the 1" strip), keeping close to the edge.
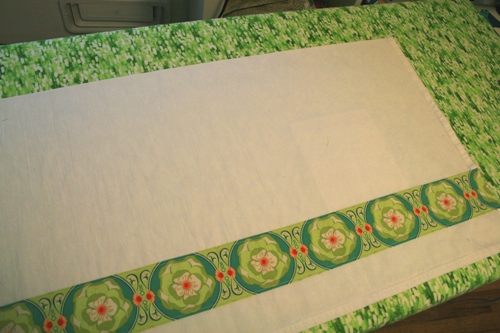
Iron your tea towel and fold it in half (wrong sides together) so it measures 33"x19". Iron the crease.
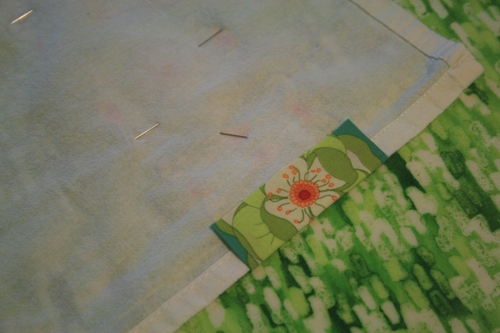
Now, place your pocket wherever you like. I like to hold the towel up (with the fold at my waist) to see where my hand would naturally look for a pocket. When you have the pocket in the correct position (and make sure it's not crooked), pin in place. Make sure you only pin it to one layer of your apron:
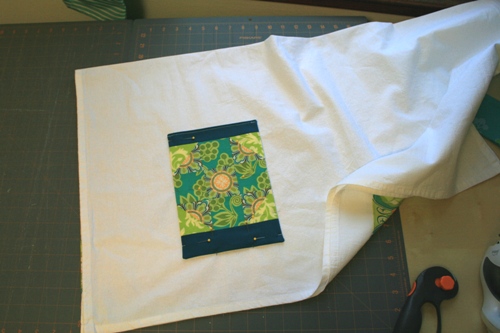
Sew the pocket to the apron on three sides, leaving the top open (again, make sure you're sewing only one layer of towel). Make sure to run your machine back and forth a few times at the top of the pocket (for strength).
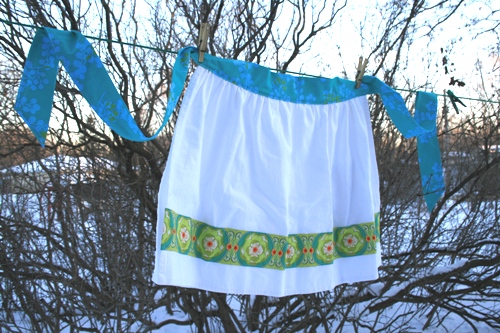
Step 2: I like to decorate the other side of my aprons with a strip of fabric. If you don't want to do this, skip ahead to step 3.
My favorite way to get a super straight fabric strip is to use freezer paper.
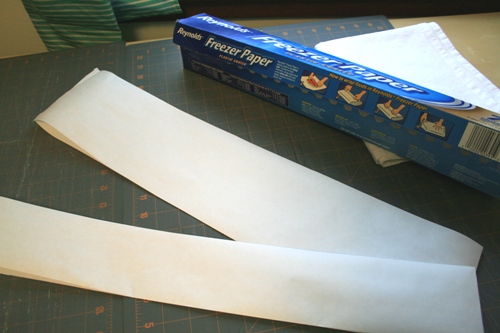
Cut a piece of freezer paper 36x3". Place your fabric strip wrong side up and place your freezer paper on top, shiny side down. Try to center your freezer paper and iron it in place:
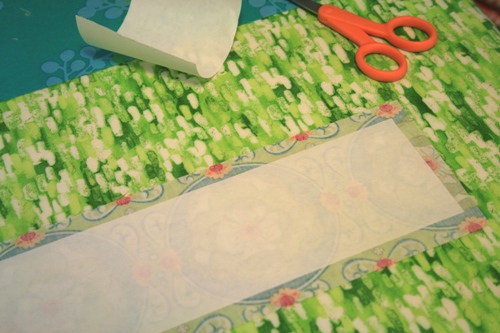
Using your paper as a guide, carefully turn your edges over and iron to make a crease:

When you finish ironing both edges, pull out your freezer paper strip and iron your edges one final time:
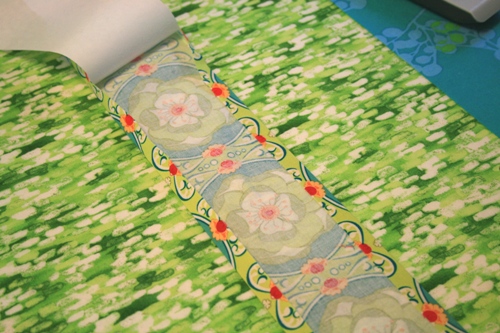
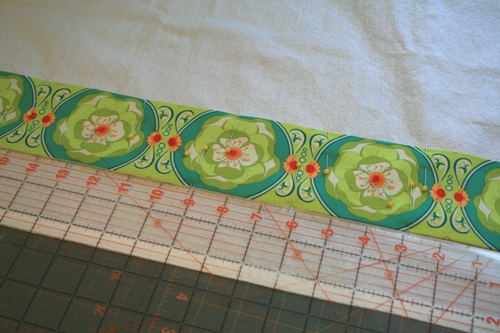
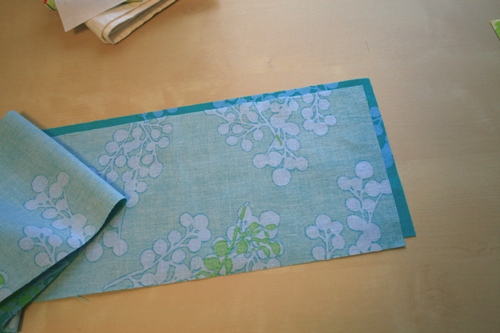
You should now have a perfectly straight fabric strip, ready to sew onto your apron.

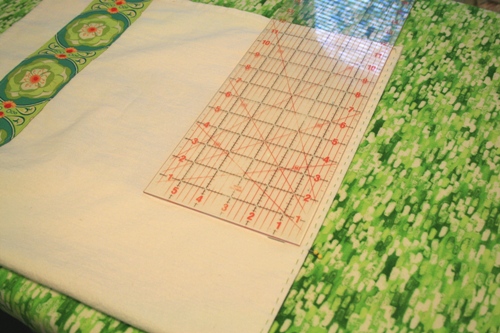
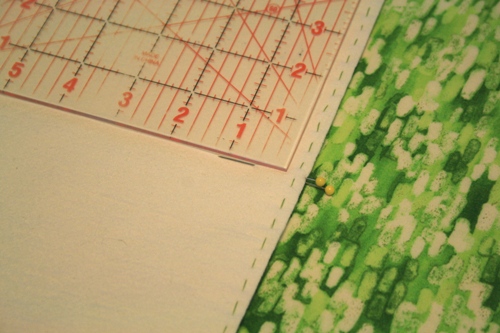
Open up your towel and lay right side up with the bottom edge towards you. Line your ruler up with the bottom edge of the towel (I put my strip 2.5" from the edge but place it where you think it looks best.) Place your fabric strip along the top edge of the ruler and pin in place:
Turn the towel over and wrap the extra fabric around the back. Iron and trim to 1":
Turn the edge under 1/2" and press to set the crease:

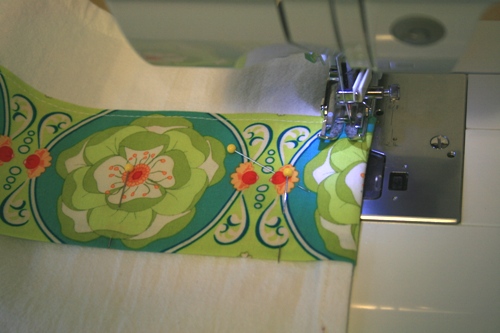
Sew around all edges of the strip, staying as close as possible to the edge (1/4" or less).

When you get to the short sides, sew a little further away from the edge (between 1/4" and 1/2")to catch more of the extra fabric on the back.
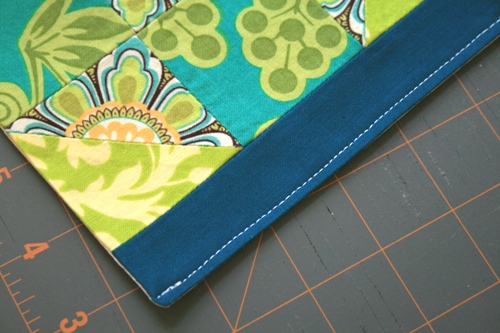
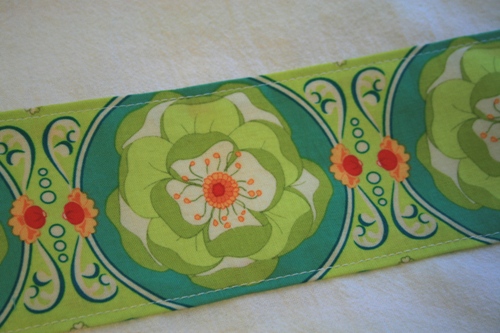
Backstitch where your stitches meet and admire your perfect applique stripe:
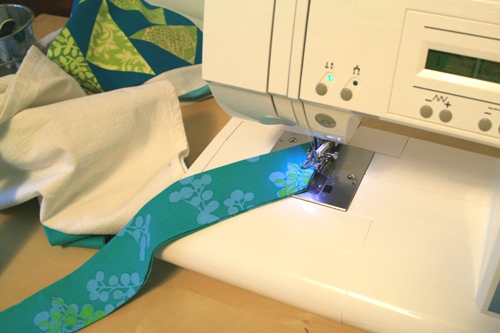
Step 3: Now that we're done embellishing our apron, we'll prepare the sash. First, take the two sash pieces and sew the short ends together to make one long piece:
Cut a piece of freezer paper 5"x40" and repeat the folding process from step 2. I like to iron the edges on one half of the sash, peel off the freezer paper, move it to the other half of the sash and finish ironing my edges. You should be able to use your one piece of freezer paper a few times before it stops sticking.
Take your sash and fold it in half, ironing to make a crease.
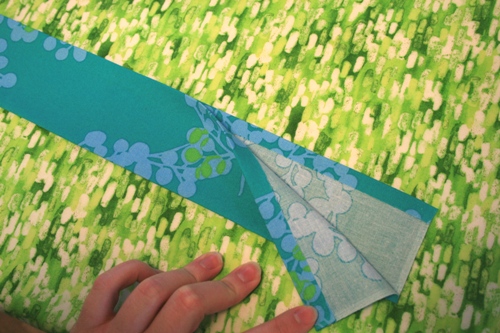
With the folded edge at the top cut the end to a 45 degree angle.
Open the sashing and trim the point.
Fold the tip over and iron to make a crease:

Fold the diagonal sides over 1/2" (or whatever it takes to get them to come together at the center)and iron.
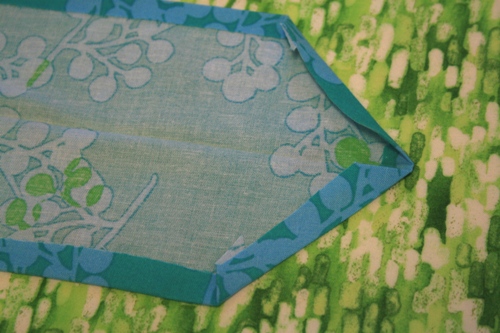
When you fold your sashing together again, you should have a nice pointy edge:
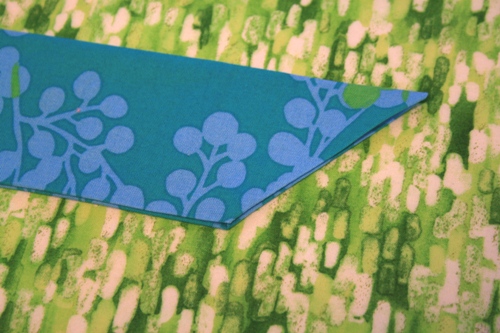
Repeat with other end of sashing.
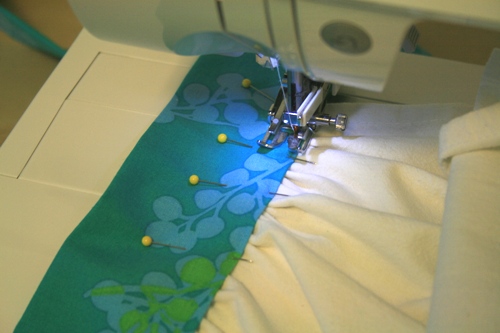
Step 4: Now we'll attach the sash to the apron. To do this, we need to gather the top edge. Make sure your apron is folded in half with a nice crease.
Prepare a length of thread that is at least 36" long (or 72" if doubling your thread like I did).

Start your running stitches about 1/4" from the top edge. Make each stitch approximately 1/4".

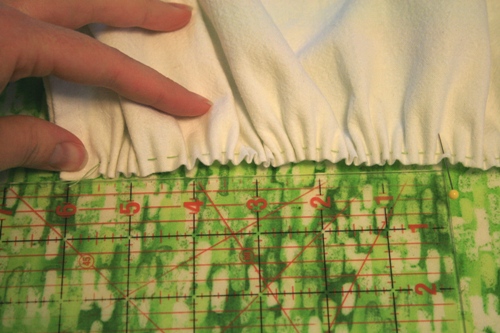
Continue until you reach the end. Smooth the apron and leave the needle and thread in place. Measure 12" from each side of the apron and mark with a pin (I folded my apron in half to get the pins in the same place...which is why these photos might be confusing).
Pull your gathering string until the apron is the appropriate width for your body (about half your waist measurement). When you get the right size, take the needle and sew a knot at the edge of your apron to keep the gathers from spreading out again. Trim your thread and begin to arrange your gathers. I like to put more gathers on the sides and leave the front with just a few gathers. This is where the pins come in...when you gather your fabric, make sure that the edge to the pin measures the same on both sides.
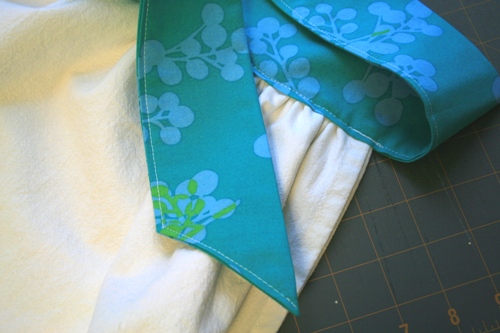
When you have the gathers where you want them, place the edge of your apron on the edge of your sash. I like to overlap the apron and sash by about 1/2".
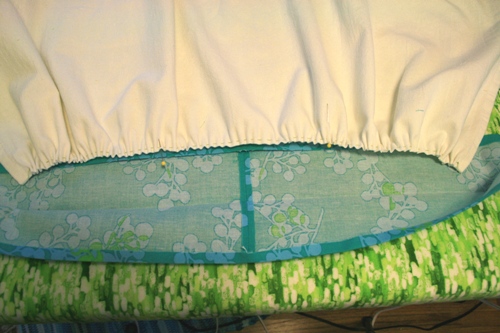
Remove your pins, fold old over your sash and pin in place, starting at the center. Your apron will want to curve so keep adjusting as you pin. When you pin, make sure the edges of the sash line up on either side of the apron. This is a bit tricky but it's important that they line up well.
Hold up the "almost apron" and see how cute it is...oh, and also to see that everything looks like it's in the right place:
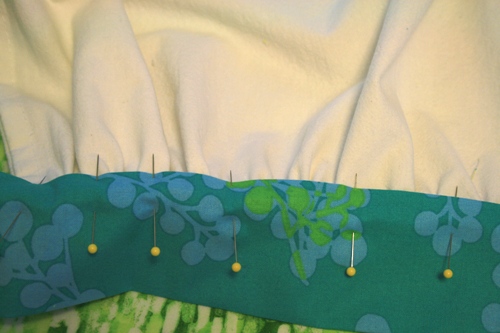
Sew your sash from end to end, staying 1/4" from the edge.
Sew over the place where the sash meets the apron a few times for strength. continue on, sewing over the gathers:
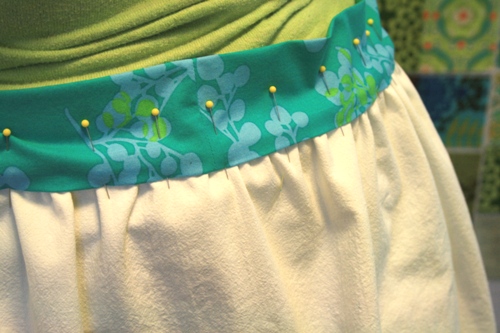
Sometimes my stitches come out even and straight...and sometimes they're a little wobbly. I don't think it matters much, as long as you catch both sides of the sash in your stitches:
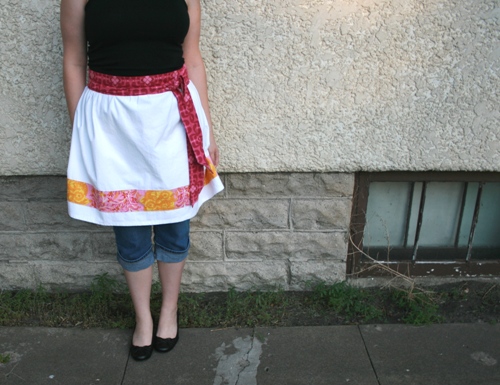
And that's it...now you have a perfectly pleasant (and super absorbant) apron! I know that seems like a lot of steps but it's actually very simple once you get going.
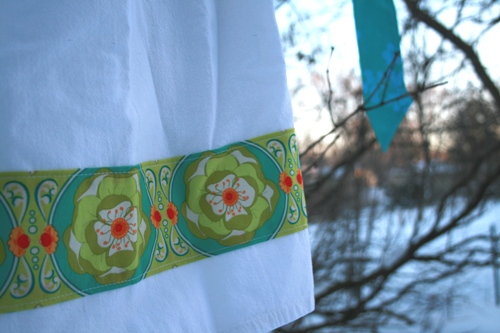
I meant to get pictures of the apron on a real person but I ran out of time. Instead, check out this pink version:
As always, let me know if you have any questions and look for the giveaway post on Thursday.